


How to Use a Nail Drill Machine for Extensions Beginner's Guide
If you are stepping into nail enhancement, whether acrylic, gel, or polygel, you will require the proper tools to get a professional touch. A nail drill machine for nail extension is the best tool in any nail technician's arsenal. Though it will look daunting when you first lay eyes on it, nail drilling for beginners can be done and is totally worth it with the proper technique and practice.
In this beginner's ultimate guide, we'll walk you through the complete process that you should know when you're using a nail drill safely at home, including its purposes, safety precautions, suggested drill bits, and step-by-step guides prepared just for beginner nail extension work.
What Is a Nail Drill Machine?
A nail drill machine UV lamp or electric file is an electric device for use in filing, shaping, smoothing, and preparing natural nails and extensions such as gel and acrylic. It finds application in most salons and in-home because it is effective and time-saving.
Parts of a Nail Drill Machine:
-
Main Unit: The location of the motor and speed control.
-
Handpiece: Where the bits are; i.e., what you hold.
-
Drill Bits: Interchangeable heads for particular use such as filing, cuticle treatment, or buffing.
-
Speed Controls: Adjustable RPM (revolutions per minute) for intensity control.
-
Forward/Reverse Control: Convenient use for left- and right-handed professionals.
Why Use a Nail Drill Machine for Nail Extensions?
So, why do nail technicians use nail drills? In short, they provide precision, speed, and flexibility.
Here's why a nail drill machine for nail extensions is so useful:
-
Preps Natural Nails Without Damage: Prevents better adhesion for extensions.
-
Shapes and Refines Enhancements: Produces smooth, proportionate results.
-
Speeds Up Removal: Facilitates product removal with less time and danger than hand filing.
-
Improves Detail Work: Works well in cuticle cleaning and edge definition.
Safety Tips:
-
How to Use a Nail Drill for Beginners Without Damage
-
Using a nail drill incorrectly can lead to heat spikes, over-filing, or injury. That’s why it’s crucial to understand how to use a nail drill for beginners safely.
Key Safety Guidelines:
-
Start at Low Speeds: Begin with 5,000–8,000 RPMs until you’re comfortable.
-
Don’t Press Too Hard: Light pressure prevents damage to natural nails.
-
Keep the Bit Moving: Avoid friction burns by continuously gliding the bit.
-
Sanitize Bits After Each Use: Prevents bacterial or fungal infections.
-
Use the Right Bit: Every step demands unique kinds of bits in order to achieve the best results.
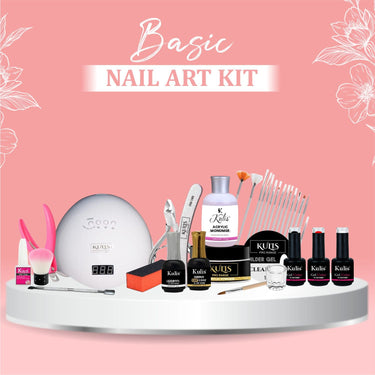
Stuff You'll Need
You cannot master a nail drill at home before you own the following:
-
Nail drill machine (variable speed control is more desirable)
-
Set of nail drill bits (coarse, medium, fine, buffer, and cuticle bits)
-
Acrylic/gel/polygel nail extension kit
-
Nail cleanser or alcohol wipes
-
Dust brush
-
Nail forms or tips
-
Base coat and top coat
-
Cuticle pusher and nippers
-
Nail primer (optional)
Step-by-step nail drill tutorial:
-
A Beginner's Guide to Using a Nail Drill at Home
-
Let's go step-by-step through how to prepare and work with nail extension s yourself with your nail drill machine.
Step 1: Preparing the Natural Nail
-
Good prep keeps your life of your extensions intact and eliminates lifting.
-
Push Back Cuticles: Push dead skin near the nail bed away with a cuticle pusher and low-speed flame bit.
-
Lightly Buff the Nail Plate: The fine sanding band is gently rubbed against the surface. Shine and oils are removed to achieve improved adhesion of the product.
-
Cleanse the Nails: The lint-free pad is saturated with nail cleanser or isopropyl alcohol.
-
Pro Tip: When learning how to use nail drill for beginners, use light pressure and short strokes. Never drill in a single place.
Step 2: Applying Nail Extensions
-
Depending on your preferred product (acrylic, gel, or polygel):
-
Use Forms or Tips: Secure them tightly.
-
Prepare the Nail Surface: Especially needed for acrylics.
-
Use Your Product of Choice: Follow the curing or drying requirements.
Step 3: Using the Nail Drill to Shape and Finish Extensions
This is where your nail drill machine for nail extensions truly shines.
a) Smoothing the Extension
-
Mount a coarse or medium grit barrel bit to define shape:
-
Highlight free edge, apex, and sidewalls.
-
Maintain consistent angles.
-
Begin low to medium RPM (roughly 10,000).
b) Smoothing the Surface
-
Convert to safety bit or fine grit barrel and buff the top surface:
-
Float (not press) over nail.
-
Feather around the cuticle space for a smooth surface.
-
Utilize a cone bit for proximity or below the nail edges
c) Finishing the Surface
-
Apply buffer bit or manual buffer and buff to prepare for top coat.
-
Clean off the dust with a brush and an alcohol wipe.
-
Apply top coat and cure under a UV/LED lamp if using gel.
Drill Bit Types for Beginners
If you’re serious about learning how to use a nail drill for beginners, understanding bits is key. Here’s a simple chart:
|
Bit Name |
Use |
|
Sanding Band |
Surface prep, light filing |
|
Coarse Barrel Bit |
Removing bulk, shaping acrylic/gel |
|
Medium Barrel Bit |
Shaping and smoothing |
|
Fine Barrel/Safety Bit |
Smoothing, surface finishing |
|
Cone/Needle Bit |
Tight edges, under-nail cleaning |
|
Flame/Ball Bit |
Cuticle area cleaning |
|
Buffer Bit |
Polishing final |
Chart table: Drill Bit Types for Beginners: Names and Uses Explained
Don't Make These Mistakes if You Are a Beginner:
-
Don't make the following mistakes when using your nail drill at home as a beginner:
-
High Speed on Natural Nails: Warming and thinning.
-
Pressing Hard Down: Dents or even pain.
-
Not Cleaning Bits: Risk of infection.
-
Using the Wrong Bit for the Job: Rough surface or damage.
-
Skipping Cuticle Work: Lifting and lessening wear time.
Maintenance:
-
Caring for Your Nail Drill Machine
-
Clean bits after each use: Soak in disinfectant and rinse.
-
Watch for overheating: Allow your machine to rest between uses.
-
Store it properly: Store bits and machines in a clean, dry place.
-
Replace worn bits: Dull bits increase pressure and decrease precision.
How to Practice Safely at Home
-
If you’re just beginning to explore how to use nail drill at home, try the following:
-
Practice on fake nails: Ideal for learning without risk.
-
Practice using a dummy hand or nail trainer.
-
Watch tutorial videos: Watching different techniques will build confidence.
-
Join online forums: Facebook groups, forums, or Reddit threads may give advice and product opinions.
Final Thoughts
Nail drill for beginners is a godsend for anyone who wishes to perform nail extensions. You're a do-it-yourselfer or wannabe nail tech, the nail drill machine for nail extensions puts you in charge, salon-quality work in your own home.
Keep in mind:
-
Slow and gentle always wins.
-
Do the right bit for the job.
-
Clean and take care of tools.
With practice, you'll feel more at ease and proficient with nail drill machine handling, and your nails will be smoother and more professional than ever before.
Level Up Your Nail Game!
Practice now and enjoy salon-quality results in the palm of your hand with your very own nail drill machine for nail extensions!